How to Use Basic Strategy When the Blackjack Table Rules Change
2026-11-13 · 23 min · 4,407 words
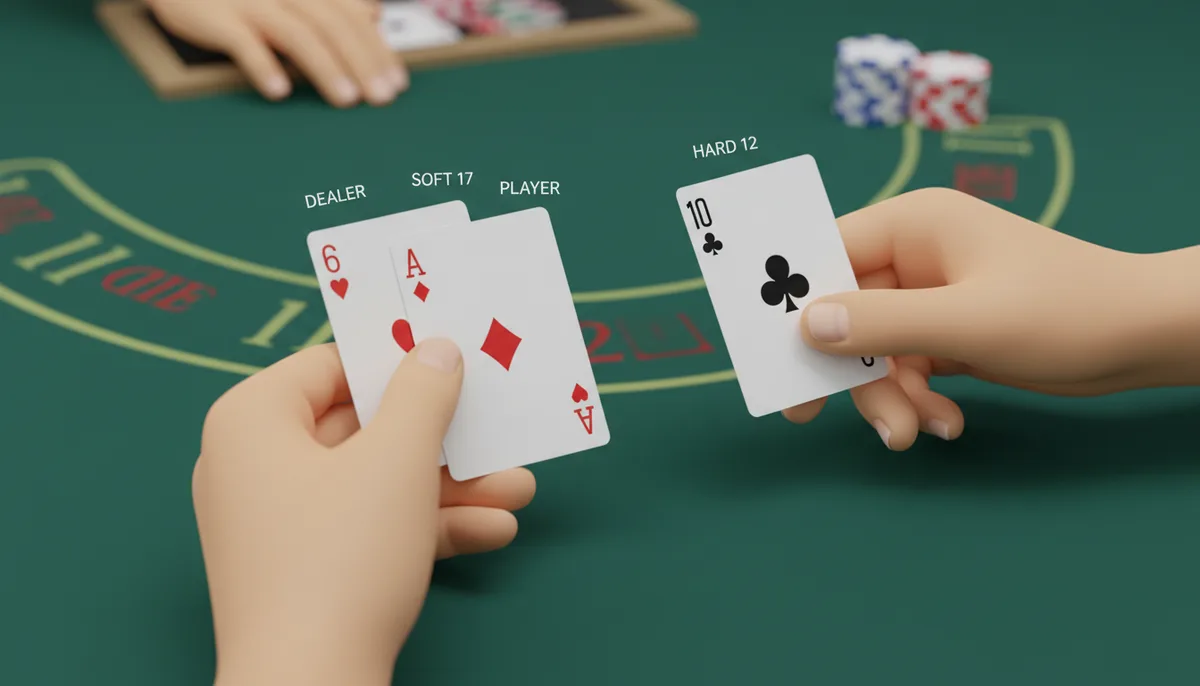
You sit down at a fresh table, feeling confident. You’ve spent weeks memorizing your basic strategy chart. You know exactly when to hit a hard 12 and when to double on a soft 18. But as you watch the dealer work, you notice something. The sign says "H17" instead of the "S17" you practiced. Or perhaps you notice the payout for a natural blackjack isn't 3:2, but 6:5. Suddenly, that mental map you built feels unreliable. You start to wonder: am I playing this hand optimally, or am I handing the casino extra money every time I press a button?
The mistake most players make is treating basic strategy as a single, static document. It isn't. Basic strategy is actually a mathematical response to a specific set of variables. When a casino changes a rule—like how the dealer handles a soft 17 or how many decks are in the shoe—they are changing the underlying math. They are shifting the Expected Value (EV) of every possible action you can take.
To play correctly, you don't need to relearn blackjack from scratch. You need a framework to identify which rules are being used and exactly how those rules force you to deviate from your standard chart. This guide will show you how to spot those variations and make the high-impact adjustments required to protect your bankroll.
How Do Table Rules Change the Math of Blackjack?
Every rule in blackjack acts as a lever that shifts the house edge. When a rule is player-favorable, the house edge shrinks. When it's unfavorable, the edge grows. The "math" of the game is essentially a calculation of the probability of every outcome: the dealer busting, the player busting, a push, or a winner.
Consider a dealer's decision on a soft 17 (an Ace and a 6). In an S17 game, the dealer stands. The hand is over. In an H17 game, the dealer must hit. When the dealer hits that soft 17, they have a chance to improve to a much stronger hand, like 18, 19, 20, or 21. However, they also have a non-zero chance of busting. Because the dealer's ability to reach a higher total increases more than their chance of busting does, the house edge rises.
As a player, this shift in dealer probability changes your optimal move. If the dealer is more likely to end up with a strong hand, you might need to be more aggressive with your doubling or splitting to keep pace. Conversely, if a rule like "Double After Split" is removed, your ability to maximize profit in advantageous spots is neutered. Every rule change is a subtle recalibration of your strategy. Your goal is to recognize the calibration so you aren't playing a 6-deck H17 strategy at a single-deck S17 table.
The #1 Adjustment: Dealer Hits or Stands on Soft 17 (H17 vs. S17)
In the modern casino landscape, H17 (Hit on Soft 17) is the standard. It is more profitable for the house than S17 (Stand on Soft 17). Because the dealer gets a "free" chance to improve a mediocre hand, the player's overall advantage is eroded. If you use an S17 strategy at an H17 table, you will consistently make sub-optimal decisions, specifically regarding how you play your own soft hands and how you double down.
When the dealer hits soft 17, they become more "dangerous" in the 18–21 range. To counter this, you must adjust your aggression. The most significant changes occur in your soft totals and your doubling decisions against specific upcards. Because the dealer's ability to improve a soft 17 increases their probability of reaching a total of 18 or higher, you often need to be more aggressive with your own soft hands to maximize your Expected Value (EV).
For a baseline game of 4–8 decks with 3:2 payouts and Double After Split (DAS) allowed, the following table identifies the specific hands where your move must change to account for the H17 rule:
| Player Hand | Dealer Upcard | S17 Play | H17 Play |
|---|---|---|---|
| Soft 18 (A,7) | 2 | Double | Double |
| Soft 18 (A,7) | Ace | Stand | Stand |
| Soft 19 (A,8) | 6 | Stand | Stand |
| Hard 11 | Ace | Hit | Double |
| Soft 17 (A,6) | 2 | Double | Double |
| Soft 17 (A,6) | 3 | Double | Double |
| Soft 17 (A,6) | 4 | Double | Double |
| Soft 17 (A,6) | 5 | Double | Double |
| Soft 17 (A,6) | 6 | Double | Double |
| Hard 16 | 10 | Surrender | Surrender |
Wait—why are so many of these the same? The table above highlights the critical "swing" hands. While many hands remain identical, the H17 rule forces you to double on Hard 11 against an Ace (where S17 tells you to hit) and changes your approach to certain soft totals to account for the dealer's increased ability to hit into a strong hand. If Surrender is offered, you may also see shifts in when you surrender hard totals against high dealer cards, though these are often identical across both rule sets.
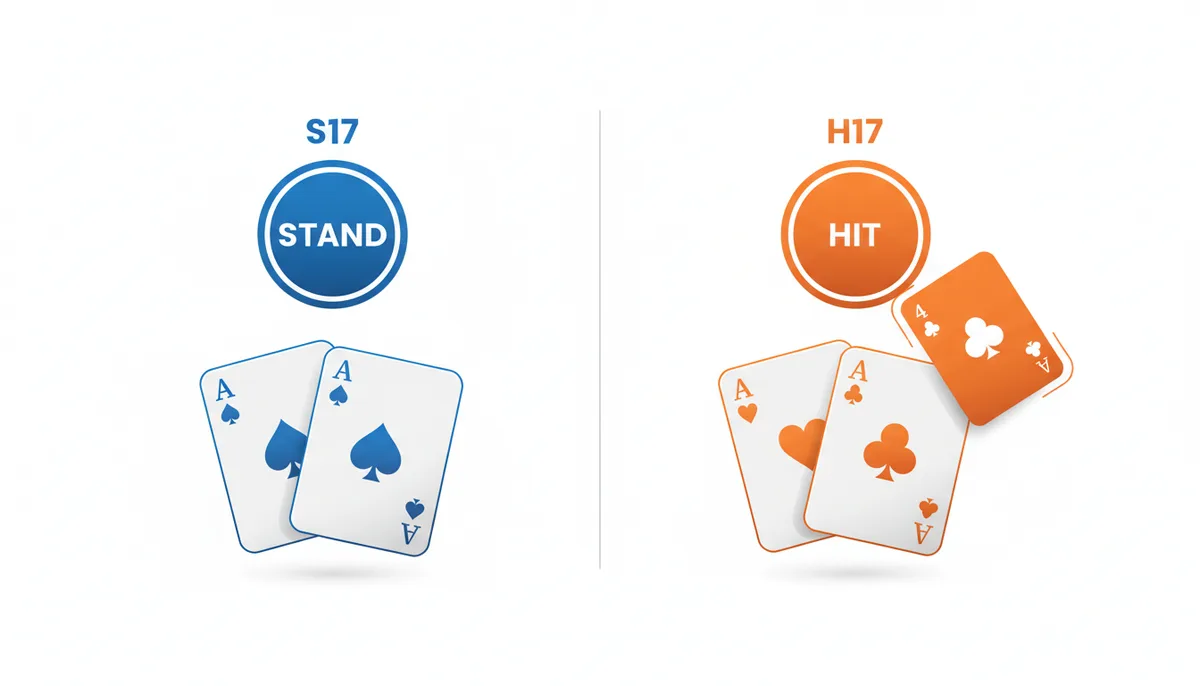
The core logic is this: H17 increases the dealer's strength. Therefore, you must adjust your doubling and splitting to account for a dealer who is more likely to reach a total of 18 or higher. If you don't make these specific shifts, you are leaving money on the table by playing too passively in high-EV situations.
How the Number of Decks Changes Your Plays
The number of decks in the shoe dictates the "density" of the cards. In a single-deck game, every card that leaves the shoe has a massive impact on the remaining probabilities. This is known as card removal. If you see a 10 in a single-deck game, the chance of the next card being a 10 drops significantly. In an 8-deck shoe, the removal of one 10 is statistically negligible.
Because of this, a single-deck strategy is more "sensitive" than a multi-deck strategy. You will find that in single-deck games, you are more likely to double down on certain hard totals or split certain pairs that you would otherwise stand or hit in a 6-deck game. However, for the vast majority of players, the difference is manageable. Most professional players memorize the multi-deck (4–8 decks) strategy because it is the most common environment. The danger isn't in the math itself, but in using a single-deck chart at a 6-deck table, which will lead to incorrect doubling and splitting decisions.
To adjust at the table, you need to know where the multi-deck strategy breaks down. Use the following tables to identify the specific hands that require a different approach based on deck count and the availability of the Double After Split (DAS) rule.
Table 1: Single Deck vs. Multi-Deck (4-8 Decks) Deviations
| Player Hand | Dealer Upcard | Single Deck Play | 4-8 Deck Play |
|---|---|---|---|
| Hard 9 | 2 | Double | Hit |
| Hard 11 | 10 | Double | Hit |
| Pair of 2s | 2 | Split | Hit |
| Pair of 2s | 3 | Split | Hit |
| Pair of 6s | 2 | Hit | Split |
Table 2: Impact of Double After Split (DAS) Availability
| Player Hand | Dealer Upcard | With DAS (Favorable) | No DAS (Unfavorable) |
|---|---|---|---|
| Pair of 4s | 5 | Split | Hit |
| Pair of 4s | 6 | Split | Hit |
| Pair of 6s | 2 | Split | Hit |
| Pair of 6s | 3 | Split | Hit |
| Pair of 7s | 2 | Split | Hit |
If you are playing at a casino that uses a Continuous Shuffling Machine (CSM), you are effectively playing a game with an infinite number of decks. The card removal effect is almost entirely neutralized. Treat a CSM game as a high-deck game (6+ decks) for your strategy purposes.
The Financial Trap: Why You Must Avoid 6:5 Payouts
This is the most important rule in the article: If you see a 6:5 blackjack payout, walk away.
Many players get caught up in trying to master complex strategy deviations for H17 or DAS, but they ignore the elephant in the room. A standard blackjack payout is 3:2. If you bet $10, a natural blackjack pays you $15. At a 6:5 table, that same $10 bet pays you only $12.
That $3 difference might seem small, but it's catastrophic. A 6:5 payout increases the house edge by approximately 1.4%. To put that in perspective, the difference between an S17 and an H17 game is only about 0.2% — a difference documented in rule-change analyses. The difference between an S17 and an H17 game is relatively small compared with a 6:5 payout. You could be the greatest basic strategy player in the world, but you cannot "out-play" a 6:5 rule. The math is rigged too heavily against you. Casinos often place these tables in high-traffic areas or low-limit sections to lure in players who think they are getting a deal, but they are actually offering one of the most mathematically disadvantaged games in the building. Always look for the 3:2 sign. If it isn't there, don't play.
Exploiting Player-Friendly Rules: Double After Split (DAS) and Re-Splitting
Once you have ensured you aren't playing at a 6:5 table, you should look for rules that tilt the math back in your favor. Two of the most impactful are Double After Split (DAS) and Re-Splitting Aces (RSA).
Double After Split allows you to double down on one of your hands after you have already split a pair. This is a massive advantage. It allows you to put more money on the table when the math is clearly in your favor. For example, if you split a pair of 8s against a dealer 6, and you receive a 3 on one of those 8s, DAS allows you to double down on that 11.
If DAS is not allowed (often abbreviated as NDAS), your strategy for splitting must become more conservative. You will refrain from splitting certain pairs against certain dealer upcards because the inability to double afterward reduces the overall Expected Value of the split.
Re-splitting Aces (RSA) is another nuance. In most games, once you split Aces, you are stuck with them. If you are at a table that allows RSA, you can split them again if you receive another Ace. While this is a great way to increase your potential winnings, it's a secondary concern compared to DAS. The rule of thumb is: if DAS is allowed, play aggressively with your splits; if it's not, tighten up your splitting range.
The Defensive Play: When to Use the Surrender Option
Surrender is not a sign of a weak player; it is a tool for loss mitigation. Late Surrender (LS) allows you to forfeit half of your bet and end the hand immediately after the dealer checks for blackjack. This is mathematically superior to playing out a hand that has a very low probability of winning.
You should only use surrender in very specific, high-disadvantage scenarios. If you are playing a hand that is statistically likely to lose, giving up 50% of your bet is better than losing 100% of it.
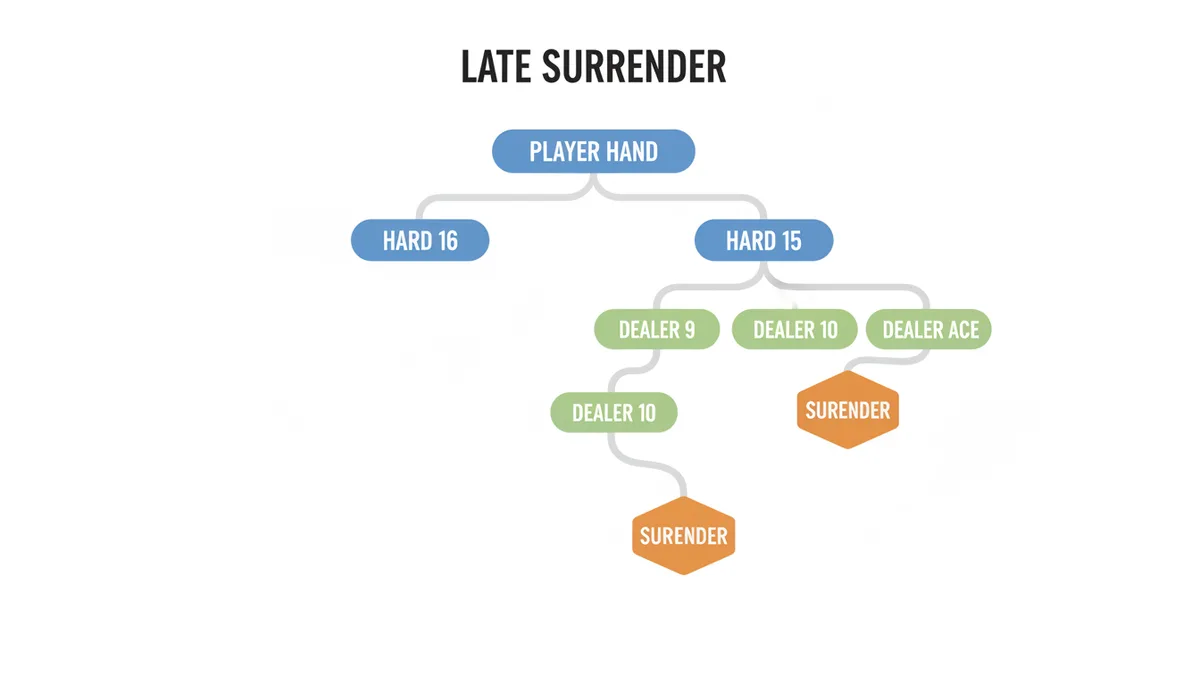
The primary hands for surrender are:
- Hard 16 vs. Dealer 9, 10, or Ace
- Hard 15 vs. Dealer 10
If you are at a table that offers Early Surrender (ES), the rules are even more favorable, as you can surrender before the dealer checks for blackjack. However, the core principle remains: surrender is a defensive maneuver used to cut your losses when the dealer's upcard makes your hand nearly impossible to win.
How to Build or Find the Correct Chart for Your Game
You cannot rely on a single printed card if you want to play professionally. Instead, follow this four-step audit every time you sit at a new table:
- Check the Payout: Is it 3:2? If it's 6:5, stand up and find a different table.
- Check the Dealer's Soft 17 Rule: Does the dealer hit or stand on Soft 17? Check the dealer's soft 17 rule to determine whether you should use an H17 or S17 chart.
- Count the Decks: Is it a single-deck game or a multi-deck shoe? This dictates your splitting and doubling aggressiveness.
- Identify Special Rules: Does the table allow Double After Split (DAS)? Is Surrender offered? Do they allow Re-Splitting Aces (RSA)?
Once you have these four pieces of information, you don't need to memorize a new chart. Use an online blackjack basic strategy generator. These tools allow you to input your specific parameters—number of decks, H17/S17, DAS/NDAS, and surrender—and produce a custom chart.
To practice, don't try to memorize the whole thing at once. Focus on the "deviations." If you already know standard basic strategy, you only need to learn the 10 or 15 hands that change when you move from S17 to H17, or when DAS is removed. Use flashcards for these specific exceptions. This is much more efficient than trying to re-learn the entire game every time you switch casinos.
Ranking the Rules: Which Variations Matter Most?
Not all rules are created equal. If you are trying to find the "best" game, you shouldn't treat every rule change as equally important. Some rules can be ignored because their impact is negligible, while others are game-breaking. Use the following hierarchy to prioritize your search for a profitable table.
| Rule Variation | Approximate House Edge Impact | Player Impact |
|---|---|---|
| 3:2 vs 6:5 Payout | +1.4% to +1.5% | Game-breakingly Bad |
| S17 vs H17 | +0.2% | Significantly Bad |
| Number of Decks (1 vs 8) | ~0.5% | Moderate |
| Double After Split (DAS) | -0.14% (Favorable) | Good |
| Surrender Option | -0.08% (Favorable) | Slightly Good |
As you can see, the payout is the only rule that truly matters in the short term. If you find a 3:2 table, you have already won half the battle. The difference between H17 and S17 is the next tier of importance. Rules like DAS and Surrender are "nice to have," but they are refinements rather than foundation-shifters.
Beyond the Charts: An Introduction to Composition-Dependent Strategy
There is a level of play even deeper than basic strategy variations, and that is Composition-Dependent Strategy. Basic strategy assumes that a "16" is a "16." But in reality, a 16 made of a 10 and a 6 is fundamentally different from a 16 made of a 7, a 5, and a 4.
In a single-deck game, this distinction is vital. If you hold a 16 made of 10+6, you have removed one 10 and one 6 from the deck. This changes the probability of the dealer busting or you hitting a specific card. In certain scenarios, if the cards making up your total are "high" cards, you might be more inclined to stand because the remaining deck is richer in small cards that could cause you to bust.
Composition-dependent play is the realm of the advanced player. It requires tracking the specific cards in your hand and understanding how they affect the remaining deck composition. However, I recommend you do not attempt this until you have mastered the rule-based adjustments discussed in this article. If you cannot play H17 vs. S17 perfectly, trying to account for card composition will only lead to more errors and faster losses.
The Anatomy of a Mistake: A Worked Example of H17 Deviation
To understand why these adjustments matter, you have to look at the specific moment a player fails. Let's look at the deviation of Hard 11 against a dealer Ace when moving from an S17 environment to an H17 environment.
In an S17 game, if you have a Hard 11 (such as a 6 and a 5) and the dealer shows an Ace, the mathematically optimal play is to Hit. While doubling is tempting, the dealer's strength in an S17 game—where they cannot improve a soft 17—makes the risk of doubling against an Ace too high for the expected return.
However, in an H17 game, the math shifts. Because the dealer is now forced to hit a soft 17, they have a higher probability of improving their hand to a 18, 19, 20, or 21. This increase in the dealer's ability to make a strong hand actually increases the Expected Value (EV) of your double. In H17, you should Double Down on that Hard 11 against the Ace.
Here is the breakdown of the mathematical logic:
- The Scenario: You have a Hard 11. Dealer shows an Ace. Rules are H17.
- The Error: You use an S17 chart and choose to Hit.
- The Mathematical Consequence: By hitting instead of doubling, you are choosing a lower-EV action. In an H17 game, the dealer's "re-draw" potential on a soft 17 makes the volatility of the hand work in your favor when you have more money on the table.
- The Long-term Result: You didn't lose the hand immediately, but you failed to maximize your profit in a high-advantage spot. Over thousands of hands, choosing "Hit" instead of "Double" in this specific H17 scenario acts as a constant drain on your bankroll, effectively increasing the house edge against you.
By failing to recognize that the dealer's increased volatility in H17 games creates more opportunities for the player to capitalize on high-total hands, you are playing a sub-optimal version of the game. You aren't just "playing safe"; you are fundamentally miscalculating the strength of your position relative to the dealer's new capabilities.
The "Invisible" Rules: Multi-Deck vs. Single-Deck Nuances
While I mentioned the impact of deck counts earlier, there is a specific mechanism called "Composition-Dependent" strategy that becomes critical when you move from a multi-deck shoe to a single-deck game. This is where the distinction between "Basic Strategy" and "Advanced Play" begins to blur.
In an 8-deck game, the "composition" of your hand (the specific cards that make it) almost never matters. If you have a hard 16, it doesn't matter if it's 10-6 or 9-7; the impact on the remaining 414 cards is too small to change your move. You hit. Period.
In a single-deck game, the composition is everything. This is because the removal of a single card significantly alters the probability of the dealer's next card. A classic example is the decision to hit or stand on a hard 16 against a dealer's 7. In a multi-deck game, you always hit. But in a single-deck game, if your 16 is composed of a 10 and a 6, the math changes. Because you have already removed one of the 10s and one of the 6s, the remaining cards are slightly more favorable for a stand, depending on the exact density of the remaining deck.
The practical takeaway for the player is this: if you are playing a single-deck game, you cannot rely on a generic multi-deck chart. You will find yourself in situations where the chart tells you to "Hit," but the actual math—due to the cards currently in your hand—dictates a "Stand." If you aren't playing single-deck, don't waste your mental energy on these nuances. If you are, you must recognize that your hand is a piece of the deck's composition, not just a number on a screen.
The Cost of Accuracy: Effort vs. Edge
Every player faces a diminishing return on their effort. There is a significant difference between the effort required to master "Tier 1" rules and the effort required for "Tier 3" rules. Understanding this hierarchy allows you to allocate your study time where it actually generates profit.
Tier 1: The Non-Negotiables (High Effort, Massive Reward). This is memorizing the 3:2 vs 6:5 payout and the H17 vs S17 deviations. The effort here is moderate—it's mostly rote memorization—but the reward is the difference between being a losing player and a break-even or winning player. If you ignore these, no amount of other skill will save you.
Tier 2: The Tactical Adjustments (Moderate Effort, Moderate Reward). This includes learning when to use Surrender and how to adjust your splitting/doubling based on the DAS (Double After Split) rule. This requires a more nuanced understanding of the game's flow. The reward is a tighter house edge, but it won't compensate for a 6:5 payout error.
Tier 3: The Precision Refinements (High Effort, Low Reward). This is Composition-Dependent strategy and advanced card counting. The effort required to master these is immense, requiring deep mathematical understanding and intense focus. The reward is a very small increase in your edge.
If you are a recreational player, your most profitable "ROI" comes from Tier 1. Don't spend 100 hours learning how to count cards or calculate composition-dependent probabilities if you are still playing at 6:5 tables or failing to adjust for H17. You are essentially sharpening a knife to cut butter when you should be looking for a better blade.
The Psychological Trap of "System" Betting
When players realize that rule variations change the math, they often make a secondary mistake: they try to compensate for bad rules with "betting systems" like the Martingale or Fibonacci. This is a fundamental misunderstanding of the relationship between strategy and bankroll.
A betting system—where you increase your bet after a loss to "recoup" your money—does absolutely nothing to change the house edge. If you are playing at a 6:5 table, every single bet you place, regardless of its size, is mathematically disadvantaged. Using a Martingale system at a 6:5 table is simply a faster way to go broke. You are increasing your bet size on a game that is actively stripping your equity.
The "system" approach fails because it attempts to solve a probability problem with a money management tool. Basic strategy adjustments solve the probability problem by ensuring you are playing the best possible version of the game. Betting systems attempt to mask the losses by changing the stakes.
The rule is simple: fix your strategy first, then manage your bankroll. If the rules at the table are bad, no amount of aggressive betting will turn the Expected Value positive. You cannot bet your way out of a bad math problem; you can only find a better math problem to solve.
Edge Cases: The Impact of the Continuous Shuffling Machine (CSM)
Most modern casinos have moved toward using Continuous Shuffling Machines (CSM). These machines take the played cards and immediately mix them back into the shoe. This eliminates the "clumping" effect that card counters rely on and fundamentally changes the "feel" of the game.
From a basic strategy perspective, the CSM is actually a simplifying factor. In a traditional shoe, the game becomes slightly more "volatile" as the shoe gets thinner, because the removal of cards has a more profound effect on the remaining deck. In a CSM game, the deck composition is constantly being reset to a near-perfect average.
For the basic strategy player, a CSM game effectively behaves like a multi-deck game with an infinite number of cards. You don't have to worry about "deck penetration" or the game becoming more or less favorable as the dealer reaches the end of the shoe. The rules remain static.
However, there is one edge case to watch for: the "speed" of the CSM. Because the machine feeds cards back into the shoe almost instantly, the hands per hour increase significantly. This means that while the house edge remains the same, the rate at which you lose money (the "drain rate") increases. If you are playing a game with a high house edge (like a 6:5 payout) on a CSM, the machine is essentially accelerating your bankruptcy. The combination of bad rules and high speed is the most dangerous environment in the casino.
Frequently Asked Questions
What if I can't find a strategy chart for the exact rules at my table?
Don't panic. Focus on the "Big Three": the payout (3:2), the dealer's action on soft 17 (H17/S17), and the number of decks. If you match those three, your strategy will be 95% correct. The adjustments for smaller rules like DAS or Surrender are much easier to learn on the fly as you notice how the table behaves.
Will casinos let me use a printed strategy card at the table?
In most cases, yes. Using a basic strategy card is not considered cheating; it is considered playing correctly. However, ensure you aren't slowing down the game. If the dealer or pit boss asks you to put it away, do so. The goal is to play mathematically, not to cause a scene.
Do I need to worry about these rule variations when playing online blackjack?
Yes, more than you might think. Online casinos often offer a wide variety of games, some with better rules and some with much worse ones (like 6:5 payouts). Before you click "deal," check the game info or the "help" section to see the specific rules for that table.
How much money do I actually lose by playing a variation incorrectly?
On a single hand, the difference is pennies. But blackjack is a game of volume. If you are playing a mistake that costs you 0.5% in expected value, and you play 1,000 hands, that mistake has cost you several much larger bets. These small errors compound into significant losses over a session.
Is it worth learning all these variations, or should I just find a table with the best rules?
Both. Finding a table with 3:2 payouts, S17, and DAS is your priority—that is your foundation. But learning the variations is what makes you a competent player who can walk into any casino and play with a minimized house edge, rather than being a victim of whatever rules a specific casino chooses to implement.
What's the difference between adjusting basic strategy and card counting?
Adjusting basic strategy is about playing the mathematical optimum for a fixed set of rules. It is static. Card counting is an advanced technique that involves tracking the changing ratio of high cards to low cards as the shoe progresses. One is about playing the rules; the other is about playing the deck.
Sources
- Wizard of Odds — Use this for the specific mathematical effects of various rule changes on the house edge (for example the difference between H17 and S17) and to support the rule-impact claims in the article.
- Nevada Gaming Control Board — Publishes official regulations and standard definitions for games like blackjack; cite it for regulatory definitions rather than as a way to check a specific table's posted rules.
- Beat the Dealer by Edward O. Thorp — The foundational book that first proved basic strategy could minimize the house edge; use it as the primary source for the origin and mathematical validity of basic strategy.